
Astro Command Center is a dashboard for your Astro system. It’s the place where you can see everything that’s going on with your system, and it’s also where you can control it.
You’ll find everything you need to know about your Astro system in one place: what devices are online and offline, how much bandwidth they’re using, which apps are streaming at any given time, how much data has been downloaded or uploaded in the past day or month, and more. All of this information is presented in an easy-to-understand format that makes it easy to identify problems and resolve them quickly.
You’ll also be able to manage all aspects of your account from within Astro Command Center. You can add new devices, change their names or locations, update their firmware versions, view usage reports and even configure parental controls for certain devices in your home network.
How do I access the Astro command center?
The Astro Command Center is a feature of Astro that allows you to access your account from anywhere. It’s a free service, and it doesn’t require any registration.
You can access the AVI Command Center from anywhere in the world by using your Astro Mobile App or using any web browser on your device.
You can also use this feature to manage your subscription, view account information, pay bills and troubleshoot issues with your services.
How do I access the Astro Command Center?
There are three ways to access the Astro Command Center:
Using an Android device:
If you have an Android device, download the Astro Mobile app from Google Play Store. Once installed, launch the app and sign in with your user ID and password to access the mobile version of our website.
Using any web browser:
If you don’t have an Android phone but still want to manage your subscription online, login at astroapp.com/commandcenter-login/manage-account with your user ID and password.
To access the Astro command center, simply head over to astro.com.sg and log in with your Astro account details.
Once you’ve logged in, you can start using the Astro Command Center.
The Astro Command Center is part of our first-of-its-kind voice remote control feature, which lets you control your TV with just your voice. The Astro Command Center is available on select Samsung smart TVs from 2018 onward and compatible with Amazon Alexa and Google Assistant devices such as Google Home or Google Home Mini.
Does Astro A40 work with Command Center?
Astro A40 TR is the first headset to work with the new Command Center software, which allows you to customize the settings for your headset.
The Astro Command Center software is supposed to be compatible with all headsets, including the A40 TR. In fact, it’s designed to be used as a universal program that can configure settings for any headset.
However, some users have reported issues getting it to work with their A40 TR headset. This is likely due to incompatibility between different PC setups and drivers, or other bugs within the software itself.
If you’re having trouble using Command Center with your headset, try these steps:
Ensure that all drivers are up-to-date – this includes Windows updates and drivers for your audio card and sound card (if you have one). These updates may include fixes for compatibility issues between software and hardware components.
The Astro Command Center software is the easiest way to set up your A40 headset. If you have an Astro gaming headset, it will work with Command Center, which means you can use your PC or Mac to adjust the volume and mute your mic.
To use Command Center, download it from astrogaming.com/support/software/. Once it’s installed, connect your headset via USB cable and run Command Center. You’ll see a list of devices appear in the left-hand column — select A40 to configure your headset’s settings.
What does the astro command center do?
Astro Command Center is the ultimate smart home hub. It’s a one-stop shop for all the devices in your home, and it even works with Amazon Alexa, Google Assistant and IFTTT.
Astro Command Center is your smart home control center. You can use it to control your lights, door locks, thermostat and other connected devices from anywhere in the world using your smartphone or tablet.
Astro Command Center also integrates with your smart home devices like Nest Learning Thermostats and Philips Hue lights so you can easily create rules that let you control multiple devices at once. For example, you can set a rule to turn off all lights in your house when you leave for work or turn on the air conditioning before bedtime so it gets cool when you get there.
The Astro Command Center is where we monitor your satellite TV service, and it allows us to troubleshoot and resolve any issues you may have with your service. In the event of an outage, our technicians will contact you via phone or email.
In order to access this page, please go to My Astro and sign in using your user ID and password. Once you’re logged in, select My Services from the left-hand menu. Select View Account Details from the list of options, then click on Additional Services at the top of the page. You’ll see a link for ‘Astro Command Center’ at the bottom of this page.
How do I put Astro in PC mode?

To put your Astro in PC mode, follow these instructions:
Download and install the Astro Command Center software from the link above.
Connect your Astro base station to your PC using the USB cable that came with your base station.
When you plug in the USB, Windows will recognize it as a removable drive called “Astro”. If you don’t see this, try restarting Windows.
Open up the Astro Command Center software (if you didn’t do so in step 2). You should see a window similar to this:
Right-click on “Configuration” and select “Open Configuration Folder”. This will open up another window with a bunch of files inside it:
In that folder, find and double-click on “Astro Device Configuration”. This will launch a text editor called Notepad:
At the bottom of the page is a section called “TCP Port”. These are all the ports that your base station uses to communicate with other devices on your network. To put your base station into PC mode, delete all of these lines except for line number 3 (the one in bold below):
Please note that Astro does not support Windows 8.1 or earlier operating systems.
To put Astro in PC mode, follow these steps:
Press and hold the power button on the side of your headset until it powers off. Once the headset is powered off, press the power button again to turn it back on. When you hear two beeps, release the power button.
Once your headset is powered on, press and hold both volume buttons simultaneously for 5 seconds until you hear a single long tone. Your screen should now turn on automatically and you’ll see “Connected as PC” at the bottom of your screen. You’re all set!
How do I change my a40s to PC mode?
I bought a pair of the A40s and have been trying to get them to work on my PC. I’ve read the instructions that came with the headset and have followed all of them to no avail. The only thing that seems to work is plugging them into my xbox controller, but that’s not really what I want.
I’d like to be able to use these as a headset for my PC so I can play games, but also listen to music and watch YouTube videos without having to wear headphones on my head. Is there any way I can do this?
1.Download the Astro Command Center software from the Astro website.
2.Download the Astro Command Center software and run it on your computer.
3.The first time you run the application, you will need to connect your headset to your computer via USB and allow it permission to install drivers (if needed). This may take up to 10 minutes depending on your internet speed. Once this is done, you will be presented with a dialog box asking if you want to enable PC mode for your headset. Click Yes and wait for another 10 minutes for the driver installation to finish (this may vary depending on your internet speed).
How do I change my Astro a10 to PC mode?
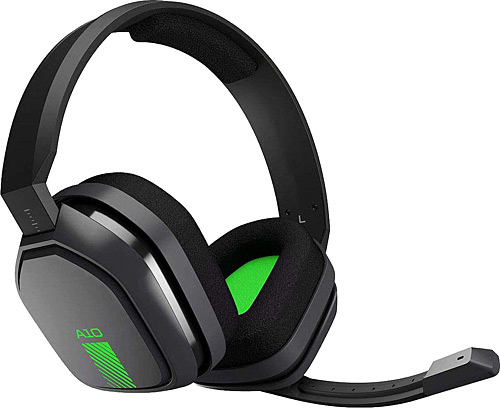
You can change the way your Astro A10 is set up by going to Settings -> Inputs & Outputs.
The first option is the Display Mode. If this is set to PC, then your Astro A10 will behave like a traditional PC gaming headset with a full set of controls on the ear cups. If this is set to GamePad, then the headset will act as a controller for your phone or tablet.
The second option is the Device Type. If this is set to Smartphone, then your Astro A10 will behave like a Bluetooth headset for mobile devices. If this is set to Tablet, then your Astro A10 will behave like a Bluetooth headset for tablets (and not phones).
The third option is whether or not you want to use the built-in microphone. If this is unchecked (the default), then you won’t hear anything from your microphone when using PC Mode or Smartphone Mode. However, if you want to use voice chat in multiplayer games such as Fortnite or PUBG Mobile on Android devices, then make sure this box is checked!
To change your Astro A10 to PC mode, first remove the headset from the controller. Next, press and hold the System button on the left side of your headset for 3 seconds. You will see a blue flashing light in each ear cup that indicates that you are in PC mode.
If you want to return to mobile mode, simply repeat this process and hold down the System button until you see a red flashing light in each ear cup.
How do you put Astro A50 in PC mode?
You can use the Astro Command Center app on your PC to put your Astro A50 into PC mode.
Here’s how:
- Download and install Astro Command Center from astrogaming.com/software/.
- Run Astro Command Center and select “Setup” from the left-hand menu.
- Select “Set up for PC gaming” from the next screen and click “Next” at the bottom of the page.
- Click on “PC Gaming Headset Setup” at the bottom of the next page, then click “Next” at the bottom of that page too. You will be prompted to download a driver update which can take some time depending on your internet connection speed. Once it has finished downloading, you will be prompted to restart your computer so that the new drivers can be installed successfully. When you have restarted your computer, go back into Astro Command Center and follow these steps again until you get to step 6 below:
How do you put Astro A50 in PC mode?
To put the Astro A50 in PC mode, simply go to the Settings menu, then select Audio. You’ll see an option called “Use Mobile Device as Headset” and it will be off by default. If you want to use your Astro A50 as a headset for your PC, turn this option on and then select “Connect.”
How do I put my Astro a20 in PC mode?
The Astro A20 is a powerful gaming headset that can be used on the PC. It comes with a USB sound card, and this allows the headset to be used with any device with a USB port. This includes game consoles such as the Xbox One, PlayStation 4 and even the Nintendo Switch.
The Astro A20 has a 3.5mm jack so it can be used on phones and tablets as well as PCs. If you want to use this headset on an Xbox One or PS4, then you’ll need to purchase an adapter that plugs into the controller’s headphone jack (similar to what you would see with earbuds). This is not included with your purchase of the Astro A20 headset.
If all you want to do is use your Astro A20 in PC mode, then there are two ways you can go about doing so:
1) Plugging The Astro A20 Headset Into Your PC/Laptop Computer Via Its USB Port And Using The Digital Sound Card That Comes With The Headphone Set (Recommended)
2) Plugging Your Astro A20 Headset Into Your PC/Laptop Computer Via Its 3.5mm Jack And Using The Analog Sound Card That Comes With The Headphone Set (Less Recommended)
Does Astro A40 work on PC?

This headset is compatible with PC. However, it’s not officially supported by Astro.
To use this headset on PC, you will need to use a 3.5mm cable that connects to the bottom of your controller and plug it into the headset. This will allow you to hear sound from your computer.
Alternatively, you can connect the headset via USB but that would require an extra purchase of the MixAmp Pro TR (which is required for these headphones to work properly).
The Astro A40 TR headset can be used with PC, but it is not recommended.
The Astro A40 TR headset has a USB sound card built into the ear cup. The sound card can only be used with the Astro MixAmp Pro TR, which is the base station that comes with the headset. This means that you cannot connect your headphones directly to your computer without using an external sound card like the Astro MixAmp Pro TR or another similar product.
The Astro A40 headset is compatible with PC. You can use it to play games on your pc and the sound quality is very good for gaming.
The only downside is that you have to buy the MixAmp separately, which costs about $100. But it’s worth it if you want a high-quality headset for gaming on PC.
Why won’t My Astro A50 connect to my PC?
If you’ve connected to your PC before, it’s possible that the USB cable is defective. If you’re able to connect with a different cable, that’s a good indication.
If not, then it may be a problem with the USB port on your PC. Make sure that the device is turned on and plugged into a working USB port. If it still doesn’t work, try another USB cable or port on your computer.
If these steps don’t work, there may be an issue with the firmware on your headset. To check this out:
1) Unplug your A50 headset from any devices (PC/phone/PS4) and turn off completely by holding the power button for 5 seconds until all lights go out (if using another device besides PC).
2) Press and hold down both volume buttons while plugging in the headset power cord into a power outlet (wall). Hold this position until you see both LEDs flash quickly (about 3 seconds). The headsets will then automatically update firmware when they are plugged into an Xbox One console or PS4 console via Bluetooth connection only – no need for any pairing between consoles or controllers!